Postingan

Main Components (Basic) A Computer

Gambar
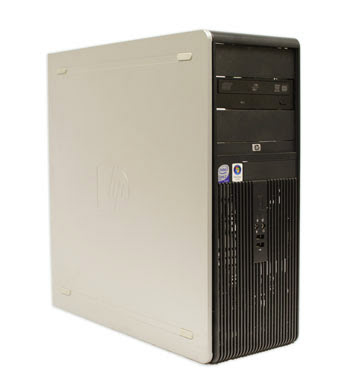
The basic components of a desktop computer are the computer case, monitor, keyboard, mouse, and power cord. Each component plays an important role when you use a computer. Case (box) computer The computer case is a box made of metal and plastic containing the main components of the computer, such as the main circuit board (motherboard), CPU, and power supply (power supply). The front of the case generally has an On-Off button and one or more optical drives.  The computer case is made in various shapes and sizes. A case of desktop computers and monitors is usually placed on a flat table. The computer case shaped like a tower is placed adjacent to the monitor or placed on the floor. An all-in-one computer is a computer where the main components (usually placed inside a case) are mounted built-in inside the monitor, which can save space. Monitor (screen)  The monitor works in conjunction with a video card (inside a computer case) to display content (images and text) on the

Learn mikrotik

Gambar
1. Before you start learning Mirotik, it's good you learn first about the basic computer network here: Basic Components of Computer Networks and Its Definition 2. Next you also need to know about the basics of the following Mikrotik terms: - What is Mikrotik? Understanding Mikrotik & Explanation - Learn Mikrotik: Mikrotik Basic Theory 3. If you want to use Mikrotik without RouterBoard, that is by installing Mikrotik on PC. 4. If you want to learn Mikrotik using Simulator like Packet Tracer, you can use Mikrotik Simulator in GNS3, like Mikrotik Tutorial here: Learn Mikrotik without RouterBoard Using GNS3 Simulator 5. To access your Mikrotik from PC is done in the following ways: 4 ways to access Mikrotik 6. Next you can configure your Mikrotik according to your desire and purpose

How to Assemble Computer (PC) and Its Picture

Gambar
Steps How To Assemble Computer (PC)  1. How to Install Processor to Motherboard First open or pull up the processor socket lock lever on the motherboard. Before putting the processor into the socket, see the dot / triangle at the corner of the processor and then match the same mark on the motherboard socket, if it is properly installed the key returns the procesor socket. Coat or apply a paste at the top of the processor to which the heatsink will be installed. Pasta serves as a heat distributor from the processor to the heatsink. Next attach Heatsink on top of processor, Heatsink key so it does not shake or look like off.  Last plug the Heatsink fan power connector into the motherboard. And make sure that the Heatsink & Procesor is installed properly. Look at the picture below  2. How to Install RAM / Memory to Motherboard View and open the lock lever. Then adjust the indentation position of the RAM with the indentation on the RAM slot on the motherboard. If it

How to Easily Remove Arrow Shortcuts in Windows

Gambar
When you have finished installing an application, usually the shortcut of the application will appear on your desktop. If you look carefully, there is an arrow-shaped sign at the bottom of the application  shortcut.  For those of you who are uncomfortable with the arrows, or just a fun fad want to delete it, you can read my tutorial article this time about how to remove the shortcut arrows on your windows desktop. Steps : 1. First open Run by pressing Windows + R key, type regedit, then Enter. 2. Next the Registry Editor window will open. Go to HKEY_CLASSES_ROOT folder> lnkfile. To speed up the search for the lnkfile folder, use the L key on the keyboard. 3. Then right click and rename the IsShortcut string to IsShortcuts as shown in the picture below. 4. Finally close the Registry Editor window and restart your computer. Next you will see a shortcut arrow on your lost desktop.

How to Install .NET Framework 3.5 in Windows 10 Offline

Gambar
 The .NET framework is an important component of the windows operating system used to run and support the development of various applications. In windows 10 is already installed the newer NET framework, ie version 4.5. Even so, there are some applications that still require NET framwork 3.5. So when you try to run an application that requires .NET framework 3.5, you must get a notification window that is more or less like the picture below. And when you try click Download and install this feature, even got notif error.                                                         Notif Error NET Framework 3.5 The .NET Framework 3.5 includes the .NET 2.0 and 3.0 versions. When you are opening / installing an application that requires one of the three versions of the .NET framework, you simply install / enable that version 3.5 only.

How to Install Windows 7 with Flashdisk Complete with Images

Gambar
Setting BIOS for Booting from Flashdisk 1. Do not remove the bootdisk that has been bootable earlier. Leave it in the condition installed on your computer / laptop. 2. Restart your computer / laptop, then press DEL key to enter BIOS menu. The most common keys used to enter the BIOS menu are DEL, F1, F2, or Fn + F2, depending on the manufacturer of your laptop / motherboard. 3. You will see the BIOS menu display as shown below. After that, move to the Boot tab using the ◄ ► button. 4. The following figure shows that the device that is in the top sequence is HDD. So your computer / laptop will boot the first time from HDD. 5. In order for your computer / laptop to boot the first time from the flash, you need to place Removable Devices at the top. How to select Removable Devices, then slide using the + / - button to be in the top sequence as shown below. 6. Then press F10 to save the result settings as well as exit the BIOS menu.

How to burn windows using rufus

Gambar
This tutorial on how to install windows 7 using USB flashdisk. Given the current majority of netbooks are not accompanied by DVD drive. It makes netbook users have trouble when they want to install the operating system, for example windows operating system on their netbook. Therefore, installing windows 7 using flash is the right solution for netbook users and for those of you who have difficulty when want to re-install windows 7 due to your problematic DVD drive. To make bootable flash, I usually use Rufus because its usage is simple and also fast. First prepare flash with a capacity of at least 4GB. Actually how much capacity of flash depending on what type of operating system we want to install. Okey directly, the following steps to create a bootable flash: 1. First, please download the software here.  2. Enter your flash then open the Rufus app. Your device will automatically be detected as shown below. 3. Click the CD drive image to select the location of the windows ISO